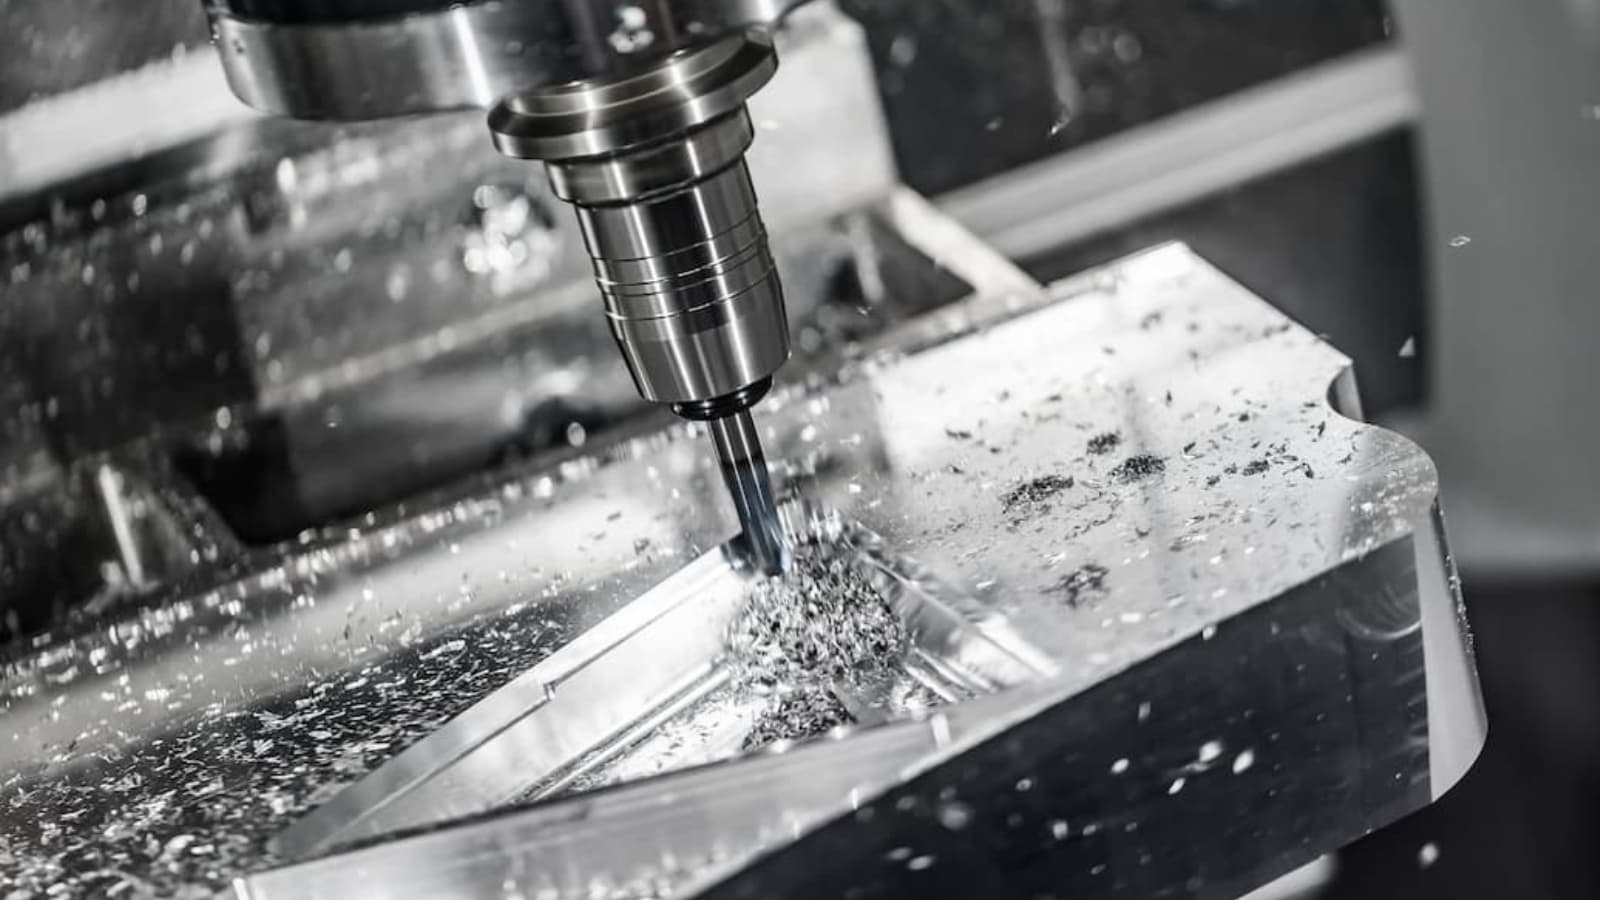
Structural integrity in 3D printing is important as 3D prints must not collapse while functioning. 3D printing is a popular manufacturing process with wide acceptance because of the quality it delivers. In terms of improving the strength of 3D printed parts, there are many things that come to play.
This article will provide details on how to make strong 3D prints and it is helpful for those either have a personal 3D printer or want to outsource to rapid prototyping services. If you have a personal 3D printer, you will learn how to tweak the settings to achieve the best results. If you want to outsource your projects, you will get information about different materials and recent post-processing technologies that will give you an idea of how to communicate to the prototyping service better. Go through a simplified version of how to make 3D printed parts strong.
Adjust Printer Settings
Having a 3D printer for your personal works is more efficient and effective in personal product manufacture. However, unless you are deeply into 3D printing with knowledge surrounding its use, you might have a little trouble making a strong 3D print. There are many settings on your 3D printer that you can tweak for a high-quality and strong print. Below are how to make strong 3D prints using them.
Increase Infill Density
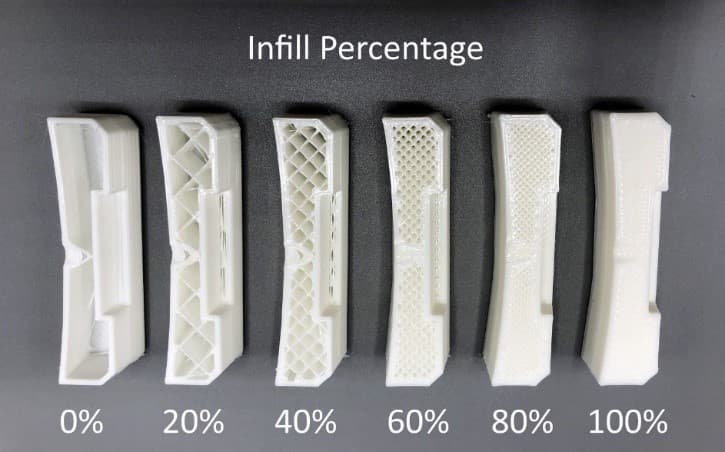
One way of increasing the strength of a 3D print is by increasing the interior density. The interior density ranges from 0% to 100%, with zero means totally hollow while 100 means totally solid.
Theoretically, having a 100 infill density should make your 3D print very strong. However, practically most designers have noticed that anything beyond 70% has a lesser impact on strengthening the 3D print. Instead, there is a tremendous increase in filament use, printing time, cost, and burden on the 3D printer.
Note: Have at least a 20% infill density for strength and, if possible, tweak the wall thickness (explained below) before increasing the infill density.
Increase Wall Thickness
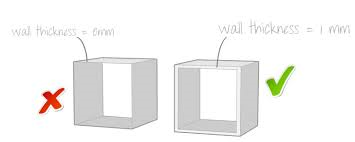
The wall thickness of a 3D printed material is measured by “Wall Line Count” and “Outer Line Width.” It shows how thick the wall and increasing it is a critical way to make strong 3D prints. Increasing wall thickness will increase strength as 3D printed parts have more strain on the outside than the inside.
Not only does increasing the wall thickness strengthen the printed material, but it also improves overhangs (geometry shapes in 3D models that are difficult to print) and water tightness.
Note: For a regular product, at least have a wall thickness ≥ 1.2mm. You can then increase it for more strength.
Use Thinner Layers
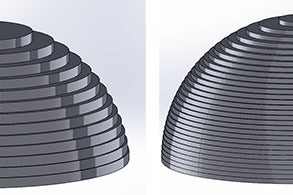
Using a thin layer will lead to better adhesion and density between subsequent layers, which strengthens 3D printed parts. Designers have said that going as low as 0.1mm (100 microns) will maximize strength. However, there is also a complementary increase in printing time.
Use a Strong Infill Pattern
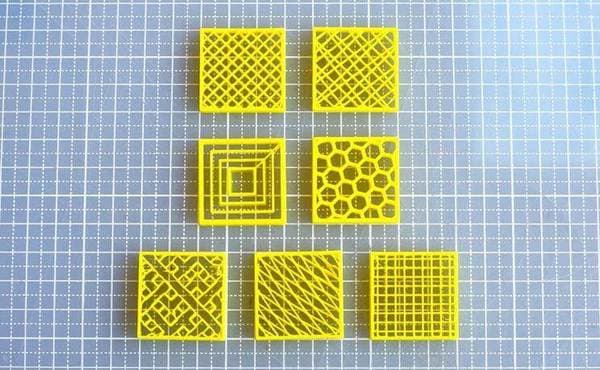
Another way of reinforcing 3D prints is by using the right infill pattern. Infill patterns work with infill density, and they serve as an internal support structure for 3D prints. They also add some stiffness to the part and prevent wall deformation. On how to make strong 3D prints using infill patterns, you should use a dense infill pattern ranging from 30-50%.
The type of infill pattern you use also determines how strong the 3D print will be. Three infills you can try are listed below:
· Triangular Infill Pattern
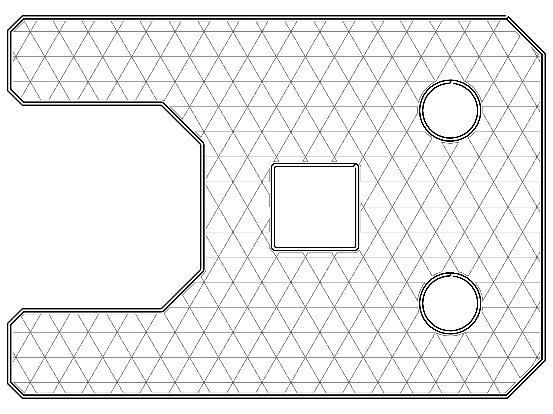
Triangular infill patterns are strong as they have a lesser chance of deforming, and they provide the best support structure. Most 3D enthusiasts attribute this to triangles being the strongest shape.
Using a triangular infill also improves print speed due to the straight-line movement of the printhead. Consequently, strength and speed make triangular infills the best choice among many 3D enthusiasts.
· Rectangular Infill Pattern
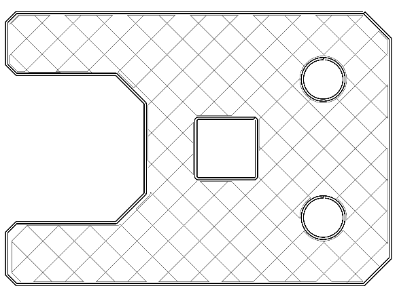
Rectangular infills can achieve 100% infill density due to their grid of parallel and perpendicular extrusions. Like the triangular infill, it also has a high print speed due to the print head’s straight-line movement.
· Hexagonal Infill Pattern
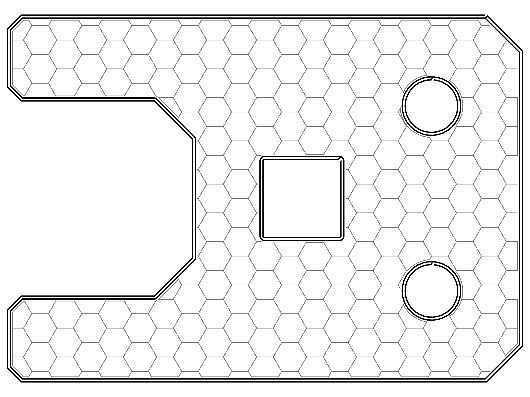
They have tessellated hexagons and the highest strength to weight ratio. Unlike the previous two infill patterns, printing is slow due to the printhead constantly changing direction, but they are also effective in reinforcing 3D prints.
Adjust Flow Rate
Adjusting the flow rate can also be an ideal method to make 3D printed parts strong. However, using this method, you must be careful such that you do not cause under and over extrusion. Therefore, most designers make sure they only make small changes.
You can adjust the flow rate for the following:
- Wall Flow (Outer Wall Flow & Inner Wall Flow)
- Infill Flow
- Support Flow
You can adjust the flow rate to strengthen 3D prints. However, most people adjust the flow rate to fix other 3D printing issues such as the inability to achieve volumetric flow and to improve accuracy.
Modify the Line Width
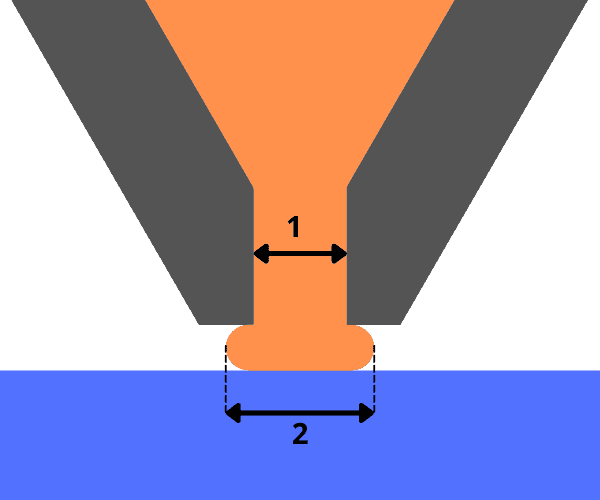
According to Cura, a popular slicer, you can strengthen your 3D prints by adjusting the line width to an even multiple of the layer height. However, you must be careful as this setting is directly related to extrusion, i.e., a massive change in line width can lead to over and under extrusion.
Reduce Cooling
Cooling is an important process in 3D printing which affects the adhesion of layers after setting. Quick cooling can reduce the adhesion due to a subsequent layer’s inability to bond with another. However, cooling also depends on the material you are using. For example, PLA works best under the action of a strong cooling fan. Therefore, you should reduce the cooling rate based on the material you are working with.
Select Strong Material to Make Strong 3D Prints
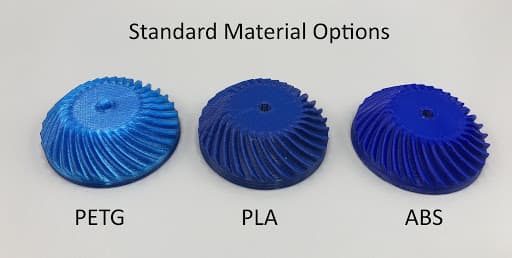
In 3D printing, there are some materials that are known to be weak. Therefore, making a strong 3D print can be about using strong 3D printing materials. There are three major materials with properties synonymous with strength.
ABS
ABS is a great 3D printing material for making strong 3D prints that are not suitable for heavy use. It is a thermoplastic with tough and light properties, which makes it a top plastic polymer in 3D printing.
PLA
PLA is an expensive 3D printing material suitable for prints with heavy use and high resolution. It has a tensile strength of 7250 psi but will degrade on exposure to light.
PETG
This is a new filament recently gaining popularity due to its strength. It has a tensile strength of about 4100-8500 psi which makes it stronger than PLA and weaker than ABS. However, it is less flexible than PLA and more than ABS.
Choosing the Right Material
To choose the right material of the three, you have to consider the resistive force, bonding between later, bending forces, rigidity, and ability to resist impacts. Below is a comparison of the three in terms of each:
- Resistive force: PETG > PLA > ABS
- Bonding between layers: PETG > ABS and PLA
- Bending force: ABS > PETG > PLA
- Impact resistance: ABS = PETG > PLA
To learn more about the differences between PLA vs ABS, check out the article on RapidDirect.
Determine Part Orientation
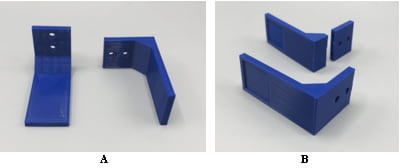
Another way of reinforcing 3D prints is using part orientation. Part orientation is the positioning of a part on the 3D printer. 3D printers work by depositing thin layers of melted materials at a gradually increasing height. The gradual increase in height is what forms the 3-dimensional parts. On the deposition of a layer, it bonds with the previous layer. However, the interface between the two layers is a weak point, and 3D prints break at these interfaces.
A good way to understand this is by making a bracket used for a shelf. The thing you will notice is that the largest force will act downward where the bracket attaches to the shelf. Therefore, it is better to print on a side with an interface that is opposite the force.
If the part orientation is challenging, you should use materials that have a better bonding tendency, for example, PETG. Also, note that part orientation will affect the smoothest of the print surface and the print cost due to the requirement for many materials.
Applying Epoxy Coating to 3D Prints
This is not a direct way of making strong 3D prints as it occurs after printing. It involves using epoxy/polyepoxide to strengthen 3D prints. Epoxy coating is an insoluble surface coating made from a hardener and epoxy coating. It is solvent resistance, durable and tough, making it a suitable way to coat materials such as PLA, ABS, and SLA.
Applying an epoxy coating to 3D prints is an easy task. Follow the steps below on how you could go about it:
- 3D prints the product according to the product design
- Let it cool and clean the surface.
- Pour a little part in a cup and warm it to achieve a viscous fluid
- Using a brush, apply the epoxy coating using a brush on the model without allowing the coating to drip down its side. Also, use small brushes to get access to crevices and corners.
- Allow the 3D print to dry.
You do not need to use much as a little of the hardener can coat and strengthen the print. Applying epoxy coating on the 3D print makes it stronger and provides it with a clear and shiny surface.
Other Considerations to Make 3D Printed Parts Strong
Tweaking the 3D printer settings is not the only way to make a 3D print strong. Aside from the epoxy coating, which is a post-processing method, there are other methods you can use. Below are two important methods popular recent.
Annealing 3D Prints
Annealing is a method that subjects 3D prints to an increase in temperature for strengthening purposes. According to the test, annealing is said to cause about a 40% increase in strength after use. It is compatible with materials such as PLA, ABS, PETG, and ASA.
Annealing is important in strengthening 3D prints as the structure of plastic makes it prone to failure. Before 3D printing, plastics have an amorphous/unorganized microstructure. However, when you heat the 3D prints, the amorphous structure reorganizes itself to a crystalline form which makes such 3D prints prone to failure.
Annealing is essential here as it changes 3D prints’ crystalline structures from large to small crystals. You can anneal the plastic polymer or the finished 3D printed product. To anneal the plastic polymer or 3D printed parts, heat it at a temperature above its glass transition point and below its melting point.
Electroplating Plastic 3D prints
Electroplating is a popular method due to it being practical and affordable. It involves putting the 3D print in an electrolyte and a plating metal (popular industrial metals are zinc, chrome, and nickel. On passing an electric current through the electrolyte, the metallic ion forms a coating around the 3D print. This leads to the formation of durable and long-lasting 3D prints.
While suitable for the purpose, its disadvantage is that it would need many layers for making better 3D parts with high strength.
Conclusion
A strong 3D print is one that does not collapse on use, which makes knowing how to make strong 3D prints. Very important. There are three ways of strengthening 3D prints. One is during the process itself (by tweaking the 3D printer’s Settings), using the right materials, and after-process treatments. Using any of the methods, you have a chance of making strong 3D prints or talking to or communicating with the prototyping service on how to strengthen 3D printed parts.
RapidDirect – Provide Custom 3D Printing Services
3D printing is a popular method used for its quality, efficiency, and effectiveness, and its ability to make complex parts. However, improving strengthening a 3D print comes with advanced knowledge on how a 3D printer works, the right material to use, and post-processing techniques.
If you desire a 3D print with the right attributes in the form of strength, durability, aesthetics, and quality, partnering with RapidDirect, one of the best rapid prototyping services in China, is a great choice. We provide custom 3D printing services, and you can get an instant quote for custom machined parts and full-dimensional reports inspection reports. For anything related to 3D printing, contact us today.
FAQs
PLA is one of the most frequently used materials in 3D printing. It has a huge tensile strength making it suitable for making structural parts. While strong, you can also reinforce PLA 3D prints using the methods highlighted above. Common methods of strengthening the 3D prints include applying epoxy, annealing, or electroplating.
Among all the printable materials used in 3D printing, polycarbonate is the strongest. It was dubbed the true king of desktop printing due to its strength (tensile strength of 9800 psi) and heat resistance. The heat resistance makes it require extraordinarily high temperature (bed should be at about 1450 while the head should be at about 2900. You will also need to enclose the material due to it warping in an open environment. Polycarbonate is suitable for making high-strength functional components.
There are many ways you can use to make prints stronger. You can tweak your 3D printer’s setting, you can change the materials to stronger materials, and you can use after-processing methods such as coating with epoxy materials, annealing, and electroplating.