Pad printing is a process that involves creating 2D images on objects having different surfaces and shapes, such as golf balls, toys, syringes, and remotes. It is vital in several industries because it is cost-effective, provides multiple color options, and delivers quality printing.
Pad printing has evolved from simple to complex printing. Therefore, it is more efficient and productive. This article will introduce how it works, its advantages and disadvantages, and typical applications to know more about the process.
What is Pad Printing?
It involves printing a 2D image on a 3D object. It is also known as tompography and tampo printing, an indirect photogravure process. This means the pad (indirect offset/ gravure) in the printing machine uses heat to transfer the image from the flat printing plate to the object.
Tampography can print detailed and high-quality images on objects with uneven shapes and surfaces at a good speed. Consequently, it is an invaluable process in the medical, automotive, electrical, and several other industries.
History of the Pad Printing Process
In the early days, pad printing was used in printing images on objects such as blue china plates and crockery. However, the evolution of the process and pad printing machines’ components now makes it widely applicable in the printing world.
In terms of the evolution of the process, it evolved from a manual process to an automated process. Therefore, there is a boost in efficiency and productivity in industries that employs them.
The most significant change in the component can be ascribed to replacing soft gelatin with a silicon pad, a better adhesive, and its chemical resistance to many materials.
Another evolution is in the printing plates. In the early days, printing plates were made using copper material, and the images were hand-printed. Nowadays, printing plates come from many materials such as hardened steel and plastic, with images photochemically or laser engraved.
How Does Pad Printing Work?
Understanding how tampo printing works comes with understanding the pad printer’s components. Therefore, this section will introduce the components of the pad printer and then how it works.
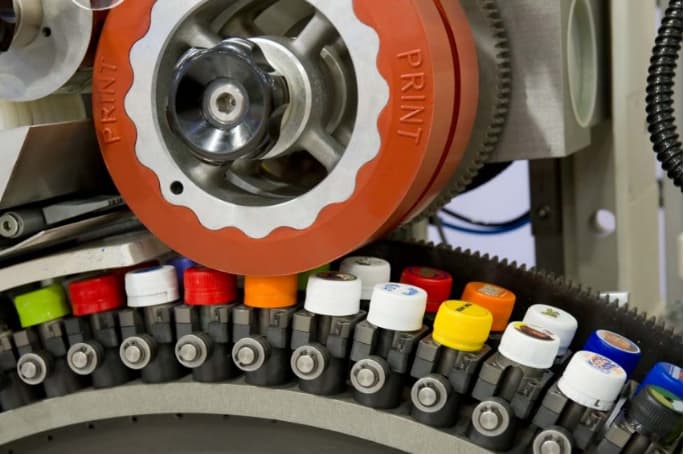
Important Components of Pad Printers
Pad printers come in different designs, setups, and printing styles. However, they all contain nearly the same components. Below are the important components common to all pad printers.
· Pad Printer
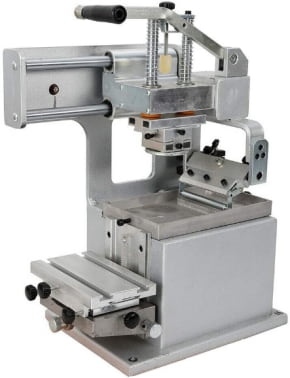
There are three pad printing machines: open inkwell, closed ink-cup, and rotary gravure. Each one has different setups and prints using different styles. The open inkwell is the most versatile printer of the three as it utilizes a spatula and a doctor blade for flooding the plate with ink and doctoring. The closed ink cup is the universal method that stores the ink in an inverted cup. The rotary gravure technology is like the open inkwell, and it is applicable in printing on 3600 around the object.
· Pad Printing Plate
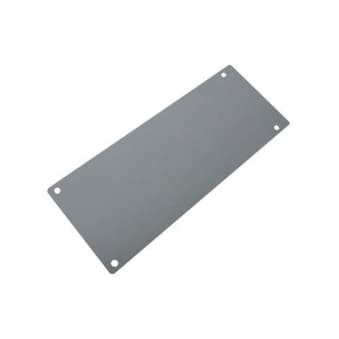
The printing plate is the component holding the image you want to engrave on the object. Common ones are plastic – thin metal plates covered using photosensitive plastics widely applicable in small and medium productions. They are also known for their flexibility, cheapness, and easy printing. Another type is the steel plate, known for toughness, durability, and better for large production.
Engraving the image on the cliche is in two processes:
– Photopolymer Plate-making
The process involves exposing the plate to UV light numerous times until etching is complete. This process is very cost-effective. However, it takes a longer time (about 30 minutes per plate) due to the long curing process than the laser engraving method.
– Computer-to-plate Laser Plate-making
The process involves etching a plate using a laser marking machine. Images created using this process are of the highest quality due to their immense precision and accuracy. The process also allows for complete traceability as images can be created without concern for variation in properties such as depth, pattern, and quality. Lastly, the laser plate-making is fast as you can create images within 5-7 minutes.
· Pad Print Ink
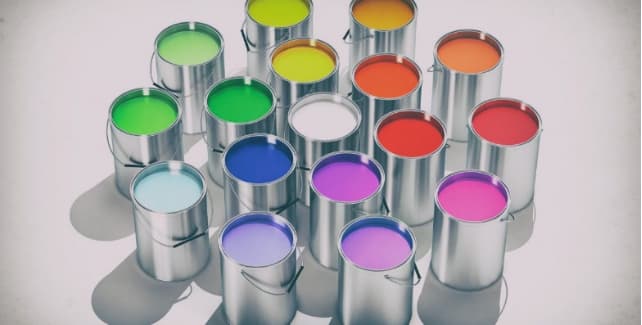
The ink is an important printing machine component that contains resins, pigments, and thinners. The resin/binder gives the ink its mechanical properties such as resistance to adhesion, abrasion, and scratch, the pigment gives the ink various colors, and the thinner gives it viscosity.
There are many series of ink available, each one suitable for different objects and industries. Common selection criteria include coverage power, adhesion properties, chemical resistance, wear resistance, glossy or matte, and light resistance. Choosing the correct ink should only come after looking at the datasheet showing these properties.
· Pad Print Ink Cup
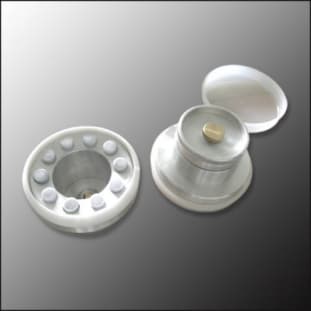
This component houses the ink and doctors the plate edge by sliding over the etch and leaving ink on it. It has two main components: the ring and the cup. The cup contains the ink while the ring does the doctoring. Common materials used for making the ring are ceramic, metal, or plastic. Of the three, ceramic is the most common as it does not scratch the plate during doctoring and can handle the printer’s constant motion.
· Printing Pad
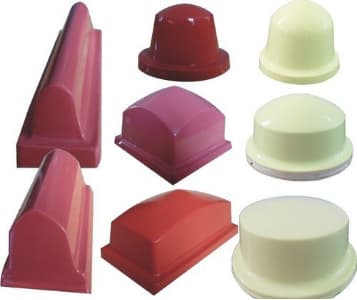
This component transfers ink from the printing plate to the object. It picks up the image by compressing itself on the ink-filled plate, slides over to the object, compresses itself again, and applies the image to the object.
Printing pads are made from silicone. Depending on the application, they have different mechanical properties, e.g., hardness, shapes, and sizes.
Pad Printing Process
After etching the plate using laser or photoengraving. The steps below show the printing process when using a closed ink cup printer:
– Step 1: Home Position
The printing ink cup sits over the etched printing plate, covering the etching. It then opens and fills the etched part with ink.
– Step 2: Exposure to Air
The ink cup closes and moves away from the etched plate, removing the excess ink. This leaves the printing plate bare but with the etched part containing the ink. The upper layer of the ink becomes tacky due to exposure to air which improves adhesion to the pad and the object.
– Step 3: Printing
The pad picks up the image by compressing (pushing the air outward) on the ink-filled plate and slides over to the object to apply the image to it. A small amount of printing ink will remain on the plate.
– Step 4: Next Cycle
As the pads transfer the image, the ink cup returns to the home position (i.e., covers the printing plate). It then fills the plate with ink in preparation for the next print cycle.
Tips for Successful Pad Printing
The process is highly intuitive so that you can easily learn. However, having successfully printed parts rely more on expertise garnered from experience. Below are some tips that can nudge you further to a successful process.
· Select the right type of the pad
Selecting the right pad for your process is important for successful printing parts. The pads come in several shapes, sizes, and different mechanical properties, which you should factor into the project before selection. Below are a few tips on selecting pads.
- Hard pads have shaper contours and finer lines and are suitable for hard, irregular surfaces
- Steep pads with air trapping allow air to escape easily during pickup and transfer.
- Large pads have a lower chance of deforming, reducing distortion during printing.
· Mixing ink
When the color you desire is not available, it is normal to consider mixing the ink. Mixing ink can be achievable with the right pad printing services (like RapidDirect) as they should have the right pad printing technology, tools, and experience to define a color that matches the target color.
· No excessive pad pressures
Avoid excessive pad pressure during printing as it can lead to over-compression, causing split pads. You can achieve this by adjusting the downstroke and letting the ink work normally. Excessive pad pressure can occur due to mechanical faults. Therefore, you should check your machine regularly.
· Choose high-quality equipment
Ensure you are using equipment that guarantees high-quality printing. Although all three types of pad printers deliver, the closed ink-cup printer is the most common. You can also check for automation as it improves productivity and reduces the chances of errors.
Advantages of Pad Printing
Pad printing is an important part of many industries due to several reasons. Below are a few reasons why you should consider the process:
- Compatible with Different Surfaces: The process can print on any surface, no matter how awkward. It does not matter whether the surface is tiny, wonky, or curvy when working with the process.
- Compatible with Different Materials: It is compatible with any material. Therefore, you can print on metal, plastic, glass, and edibles such as sweets.
- Cost-Effective: The process is cost-effective and easy to operate. Therefore, it is a realistic printing option for any business looking for low cost personalization, traceability, and identification.
- It Delivers Quality Printing: The printing process delivers a crisp and quality finish on any surface. This is regardless of the object’s shape and material makeup. Hence it is important in printing on small parts, e.g., very tiny electrical components.
- It Supports Different Color options: Tampo printing has many colors to serve the different aesthetic requirements of many businesses. In situations where the colors are not available, you can also mix colors using the right technology and tools to achieve the right color.
Disadvantages of Pad Printing
Even though it looks like a miracle printing process, it also has drawbacks. Below are a few disadvantages of the process.
- It is Slow: The process is slower than other printing techniques, such as hot stamping. Therefore, it might not be the most efficient and productive printing technique
- It has a Lesser Printing Area: Tampography can print small images on large objects. However, there is a limitation on the area you can work with.
- It Can Lead to Color Issues: Color issues such as tonal inconsistencies can develop when printing large blocks of colors. This will lead to a drop in quality, increase in cost, and wastage of raw materials.
Applications of Pad Printed Parts
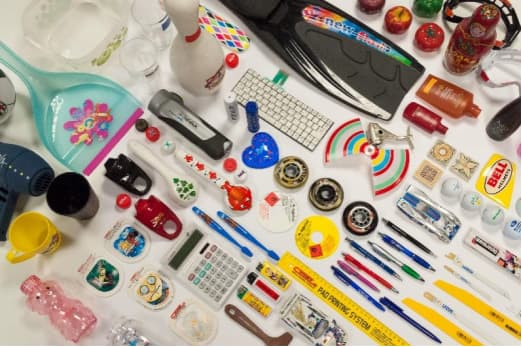
Pad printing is suitable in many industries for identification, traceability, etc. Below are a few applications of these parts.
· Medical equipment
The medical industry uses pad printing for equipment and products such as prosthetics, tubes, IV bags, syringes, and casings for identification and traceability purposes. The process is common because of the need for strict precision. Pad-printed medical parts are always marked using medical-grade inks due to the need for non-toxicity.
· Automotive industry
The automotive industry also uses pad printing for labeling and decorating vehicle interiors, exteriors, and underhood components due to the flexibility needed to tackle the different shapes and sizes of automotive parts. Examples of motor parts marked with the process include radiators and batteries.
· Consumer appliances
It is suitable for decorating, indicating instructions, and branding consumer appliances such as torches, radios, headsets, and laptops. The ink used for consumer appliances must be compatible with the environment you will be using, wear and tear-resistant, and non-toxic if the product comes in contact with humans.
· Sporting goods
It is suitable for displaying iconic names, events, pictures, etc., on sporting equipment and merch. Also, the ink should be wear and tear-resistant and non-toxic.
· Cosmetics industry
It is also suitable for printing images, texts, instructions on cosmetic product containers, tools for branding, or passing instructions. The process is commonly applicable in printing pictures on creams, lotions, and perfume containers.
· Electronics
The electronic industry uses pad printing to create different image sizes on electric appliances, such as circuits. The technique is suitable for labeling parts for easy identification and traceability.
Pad Printing vs. Screen Printing: Which is Right for You
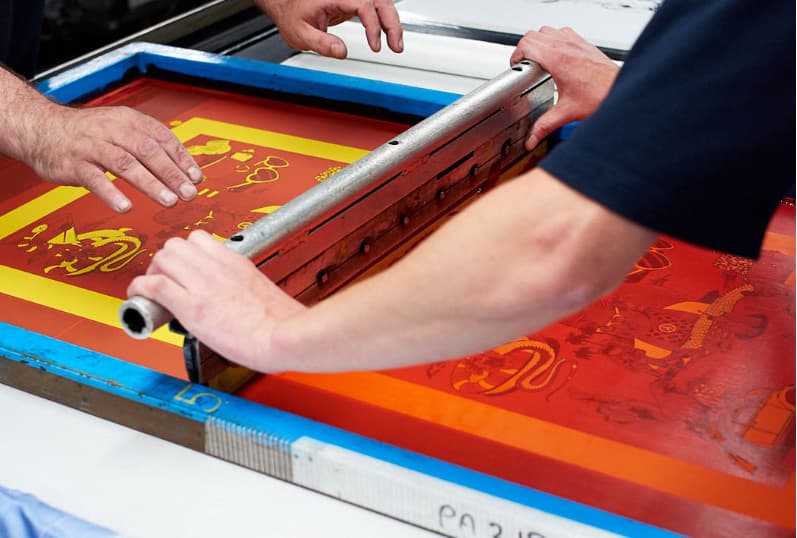
Screen printing is a process that involves printing an image on a flat object by transferring ink through a screen overlay with an ink-blocking stencil containing the design to the flat object placed below the screen. Ink transfer occurs by pressing the screen using a roller or squeegee.
Screen printing and pad printing are compatible with multiple colors. However, screen printing involves applying the colors separately that delivers great color saturation and opacity, while the latter involves mixing them.
Compared to pad printing that’s suitable for smaller objects of different shapes, screen printing is the better method for large-scale projects that involves printing on large, flat, and smooth objects made from paper, metal, and wood. However, pad printing is better due to being cheaper and easier to set up than screen printing.
Conclusion
Pad printing is a process that transfers 2D images engraved on printing plates to objects of different dimensions and sizes. It is highly accurate, precise, and efficient. However, choosing the best materials and components should only come after having a thorough understanding of the process. Therefore, this article talked in-depth about the process giving you a thorough understanding.
RapidDirect offers a wide range of surface finishing services for your needs. If you need pad printing for prototypes or high-volume production, you can contact us to request a quote today.
FAQs
The printing plate should last between 50000 and 100000 doctoring. Doctoring is when the inkcup passes on the printing plates. The longevity of the printing plate depends on factors such as printing plate materials with steel more durable than plastic, and the engraving method, with laser plate-making more lasting. Improper use can also lead to a decrease in lifespan.
It has a high level of accuracy with line definition down to about 0.0001″. The level of accuracy also depends on the etching process, with laser etching being the most accurate.
Yes, you can print on paper. The process is compatible with a wide range of materials. This includes plastics, metals, rubbers, and acrylic. However, the ink must be compatible with the object to be printed on.
